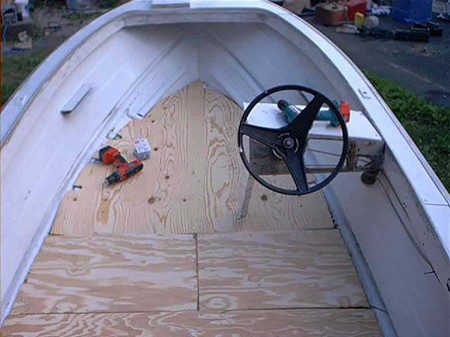
Need a new floor installed in your boat? Try your hand at replacing it. Here is how you can repair the fiberglass floor in your boat. Read on.
Procedure:
Items Needed to Repair Fiberglass Floor:
- Rubber Gloves
- Cloth
- Resin
- Circular Saw
- Grinder (4 inches)
- Drill
- Acetone
- Belt Sander
- Square
- Dremel Tool
- Disk Sander
- Saber Saw
Step 1
Take out all the screws that are securing the middle console and helm seat against the boat deck. Disconnect steering cables and all other wiring. Also, take out the shift cables and the throttle from the shift control box.
Step 2
Use the Circle Saw blade to cut into the boat deck. Leave three inches leeway on all sides and the back and front. This is where the new structure will be.
Step 3
When you have removed the flooring, inspect and make sure the stringer are in good shape. If they are not, remove the foam and dig the ground. You’ll have to sand the surrounding fiberglass so the new set of stringers can be installed with a lot of ease.
Step 4
You can stagger the new stringers between the old ones to reinforce things.
Step 5
Measure the stringers.
Step 6
Write the measurement on a piece of ¾” plywood.
Step 7
You need the decking to be flush when installed on the stringers. You may have to use more than one piece if using one is not sufficient. Butt them together.
Step 9
Cut the braces for the boat. Notch them at the bottom. The notches should measure 3”x3/4”. Apply a layer of fiberglass resin.
Step 10
Make sure all the separate components are in their proper places. Brace the cross boarding and stringer using clamps. You can use wooden blocks as an alternative. Now, use 3” of tape to secure these pieces.
Step 11
Use a Circular Saw to cut the boat deck. It needs to measure 1/2 to 3/4″ apart from the sides. You want the floor and sides to be a smooth so chamfer the edges. Use 3/8” notching for the front and rear. Also, glue a 1″ long deck piece at the point of intersection.
Step 12
Clean the notching with a dremel and sanding drum.
Step 13
All pieces should have a fiberglass resin coating. Check at this point to make sure you are consistent.
Step 14
Make the notches in the rear boarding for the boat. These should accommodate motor mount hardware, cable, scruppers.
Step 15
Install the deck and epoxy the places where the deck intersects with the cross pieces and the stringers. Make sure the screws are space six to nine inches apart.
Step 16
Add the second piece. Glue it, seal it and screw it securely into place.
Step 17
The whole deck should be in the right place now. Add a third piece parallel to the previous one. Notch it with the right measurements, glue it and screw this into the correct position.
Step 18
Fiberglass the entire surface of the deck, apply some resin and matting. Combine resin with cabosil and fill the spaces around all joints and edges. Use scissors to slice the edging down to size so the resin can be applied smoothly. Place the matting down properly. Apply it with a quart of resin. Do not allow air bubbles to settle in. You can use a syringe to assist with consistency. When you apply the carbon filter, try using a respirator for your own safety. Acetone is hard to work with without one.
Step 19
Allow the fiberglass coatings to dry and then sand the entire surface area. Use a vacuum to clean your area. Use acetone and caution. Do not inhale the fiberglass. Apply the paint and countersink all screws with silicone.
