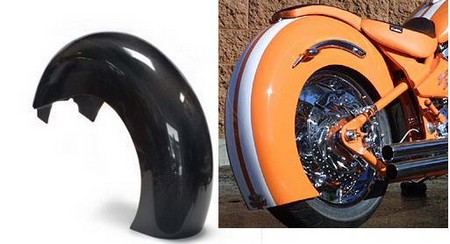
I have been involved in my fair share of motorcycle accidents over the years. Some injuries have resulted, and I’ve had to hire the assistance of a motorcycle accident lawyer for the legal proceedings. Even small brushes with other vehicles can result in you having to call that motorcycle accident lawyer to help you again, and some pretty nasty damage to your bike. Not to mention, if your leg is in the way things will more than likely be far worse. So in looking for ways to try to mitigate the danger, riders like myself have been looking to fenders. Installing a fiberglass motorcycle fender is a new rage in the motorcycle industry because the fiberglass is considered as an ideal material for motorcycle and hot rod producers.
Fiberglass proves to be sturdy and lightweight material, thus making fiberglass motorcycle fender to be equally stronger and much lighter than the metal fender. Fiberglass fender is easy to make but requires broad research and intricate processes in the development of the strong and sound product. If you encounter any injuries or problems, you can hire or look for a personal injury lawyer in charlotte or visit them online.
One of the draw backs in the formation of the fiberglass fender is that it is comparatively challenging than the metal fender. Here the clear instructions and two processes are discussed in detail in building the fiberglass motorcycle fender. The things that you will require are: fender, scissors, body filler, degreaser, plastic putty knife, spray gun, medium-grit sandpaper, air cutter, fiberglass resin, fiberglass cloth, mold release agent, paint brush and gel coat.
The first process in making the fiberglass motorcycle fender is creating a mold that involves 6 basic steps to be followed:
- Copy a fender to be made or create a model from clay or foam. Use degreaser to clean dirt or oil from fender. Smooth the fender evenly with sand and body filler by using medium-grit sandpaper.
- Spray the fender with gel coat. Leave it for 2 hours time to set.
- Cover up the fender with fiberglass cloth with overlapping edges. As per directions prepare the fiberglass resin first, and then with the help of brush start applying from the middle of the fender and working out at its edges. The cloth should be well soaked.
- Repeat the above step using 4 layers of saturated cloth with resin on the fiberglass motorcycle fender.
- With the plastic putty knife smooth down the fiberglass cloth to push out air bubbles from the edges. Keep the fiberglass to set for 3 hours minimum.
- Now remove the fiberglass from the fender. Cut the excessive cloth or hard material if any. Fill the mold by using body filler and sand treated areas with medium-grit sandpaper if you find any flaws.
The second process is creating the fiberglass motorcycle fender that involves 5 steps that are mentioned below:
- With the spray gun spray the mold release agent in the mold and set it for 1 hour. Later on, spray the gel coat on the mold and set it for 2 hours minimum.
- Put the fiberglass cloth into the mold and make sure that its edges hangout by 2 inches. Prepare the resin as per directions and apply from the middle of fiberglass cloth till the ends of the mold thoroughly.
- Repeat the above step with 4 layers of fiber glass cloth into the mold.
- With the plastic putty knife smooth down the fiberglass cloth to push out air bubbles from the edges. Keep the fiberglass to set for 3 hours minimum.
- Remove the fiberglass from the fender. Cut the excessive cloth or hard material if any. Fill the flaws on the mold with body filler.
